Tuesday, December 18, 2012

Birthday Bash: Happy 9th Birthday Chaddy

Yes it's that time of the year again, one of my 'babies' is getting older again. Chad is now officially 9. My baby boy. Yes I know he is not a baby anymore but I think all my children will always be my babies. Thank goodness they still let me give them lots of hugs and kisses, not without the sighs and rolling eyes, but I grab every hug and kiss I can get.

He really is my most social child and much loved with his blonde hair, outspoken personality and sense of humour. People seem to naturally warm to him. He always asks the wrong questions at the wrong time in very public places with a disconcerting and discerning honesty which throws people - and has been known to offend sometimes. A real ray of sunshine in my life.

We have shared some very special moments, lots of memory moments - caught on camera and some not but that I will never forget!
Of course we always start with the birthday morning where he got to watch cartoons at granny's house, which is his favourite thing! I don't normally like too much television but DSTV has it's uses at times. Also in our house, one of our birthday traditions is the birthday person gets to choose the meals for the day. Now the rest of my clan normally choose all the cereals I don't normally let eat the rest of the year. The ones with all the colours and pops and sprinkles and twists. Not this boy. He loves Rice Porridge. And so for breakfast he had THREE bowls.
He loves creating, give him paint, clay, pottery or blocks - his mind his always creating. We took our first visit to the Clay Cafe in Hout Bay and he was able to paint and create - not a word, which as you may know is rare.
Of course this year has just been one of hair hair and more hair. My blonde boy who doesn't want me to cut it. And of course after a shower, who knows who we might find - Einstein?
Which didn't mean that he couldn't do an annual midnight visit to the hospital. This time it was a 10 pm visit to emergency with an unknown eye swelling. Poor boy and poor dad who took him and only managed to get to bed at about 2am the next morning.
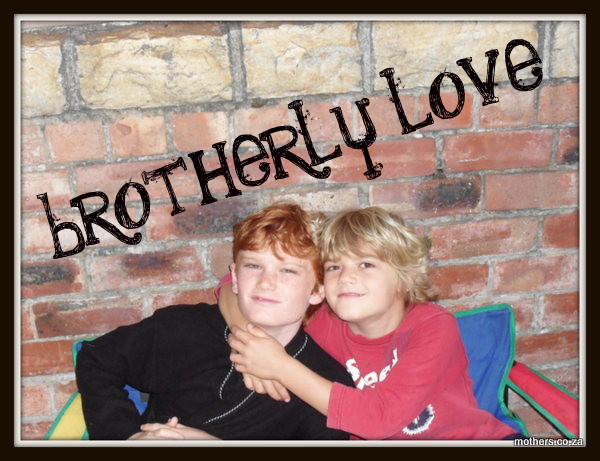
And there is always lots of love to go around! So much love from this very affectionate child of mine. When he sits next to me, he has to swing his arm over my shoulder or come in for hugs and kisses. And besides this rather fabulous mother that he adores, he loves his oldest brother. (though don't tell his other brother or sister:)
Loves his dad, though I can totally get that! Love him too:0
Of course his love is not limited to the human variety, this is my sweet and cake lover. He can put away a slab of chocolate in no time. And cake, well with Charly's Bakery down the road - or should I say the trainline, - lots of opportunity for him to get into his favourite past time - eating cake!
We took our first trip to the the theatre on our date night. He was so excited and thrilled to be one of the special guests with the rest of the media.
He also took part in his first Nippers competition and clearly winning was not a problem. Funny though, he's not competitive like his brothers. But with his mom yelling and cheering him on, he runs and swims like the wind.
And if you're lucky enough to have a chat with him, you will find that 5% of the conversation is Chad asking questions, and 95% of you trying to answer them or research them if the answers are a bit tricky.
Another year iin his life has passed and time rushes by. I am thankful for every day I have with all my children. Life is precious and each moment a treasure!

Wednesday, December 5, 2012

Christmas on a Budget: Decorations

Christmas Decorations
How is it going with getting your Christmas Gifts ready? So far we have looked at Christmas Gifts on a Budget and then those Intangible Gifts .  While you are busy with getting those gifts ready for Christmas, decorate your house with some lovely crafts that you and your children can do which allows you to decorate your home simply and beautifully without spending a whole lot of money.  Your children will love it too.

Its funny, I love my children crafting but I always liked the shop bought tinsel and decorations.  But I find the children's enjoyment of festivities is directly proportional to how involved they are.  This year I decided to let them do everything! We might not get everything done but I want them to take ownership of this and I know its special for them to see all their decorations up for everyone to see.

So the first decorations we made were Paper Snowflakes.


Paper Snowflakes Tutorial (finally Lesley:)

We had a look at a couple of templates but really they didn't make much sense to me.  Maybe because I have some flu and my brain seems to be rather thick or maybe its because the creative side in me, refuses to copy other peoples designs.  I eventually ventured into the frightening world of Paper Snowflakes all by myself.  (dramatic I know but I always love a bit of drama in my day)

So here we go, excuse the amateur photos!

First you can start with an A4 piece of paper.  I have scrap white paper (recycled) but you can do this with colour paper, old newspapers or even tracing paper - really anything goes.
 Fold a square
Cut the extra bit off

Fold the triangle over
 Fold the triangle again.

I have drawn a design in a black marker but this is only so that you can see clearly what I have done.  If you want to draw a design on the paper, rather use pencil.  You will find that to design a snowflake the first couple of times, you will want to draw a design, but eventually you will be able to do it freehand!
The black bits are the ones you want to cut out.  The point at the bottom is the centre of the snowflake.
This is what it will look like once its been cut out.  You can see that I still need some lessons in cutting along the lines, but doing this at 12 o'clock at night when I should be in bed and not wearing my reading glasses may have aggravated the situation..  Once it's cut out, unfold it very gently so as not to break this delicate creation.
Beautiful even if I have to say so myself:)

Easy peasy.  

So here are some others that I just did to give you a few more ideas- but once you get the hang of it, you'll really let your creativity flow.

Here's something a little more symmetrical.


And a paper snowflake that is very simple.
You can see that I am getting tired of colouring in but hopefully can see what I am doing.

And the finished product?

 This was the finished product in our front window.  Aren't they beautiful?  I only made 2, the rest were cut by my children without any pattern.  Once they worked out how to do it, they just went crazy and just wanted to cut more and more.

The look lovely by the window and if there is a slight breeze they twirl beautifully.  I just used a regular punch and made a hole at the top and the bottom of the snowflake.  Then I connected them with fishing line, but I think any kind of string would probably work.  

Happy Crafting! 

Our next Christmas Decoration will be making Christmas trees out of magazines.

Tuesday, December 4, 2012

Christmas on a Budget: Christmas Gifts Part 2

GIFT BOXES
These are great for families.  When you buy a gift for the whole family it also reduces the cost of trying to buy individual gift. These can usually be packed in a recycled shoe box which you could get at most shoe stores if you haven't got any at home.
 Movie Box
Popcorn, Chocolate, Crisps and a DVD voucher 
Ice-Cream Gift Box
Cones, Sprinkles, M&M's/ Smarties, 100's and 1000's individual wrapped
( I know this one has been doing the rounds - I don't know where it originated from -  but don't let that stop you )
Garden Lovers Gift Box
Use seeds that you have collected out of vegetables you have cooked with.  Tomato, Green pepper, Beans, Sunflower Seeds, Chillies.  Wrap them individually in homemade envelopes. You can even use a magazine picture on the outside.  A seedling tray (recycled egg box tray), a small bag of soil or compost (from your garden) and some lolly sticks with the names of the vegetables you have planted.  And if you are a crafty person you could even sew some gloves from some scrap material at home.  Any person who loves gardening will love this!

FILL A MUG/ GLASS
These can be bought at a second hand store or from one of your cheaper outlet stores.  The more obscure the shape the better. 
Fill the mug with:
* fudge
* chocolate
*  a little bag of special tea, coffee and sugar
* teddy bear
* plant (which you can get from a cutting)

RECYCLED SCRABBLE
Second hand stores often sell scrabble because the previous owners have lost pieces (and then its really dirt cheap because no one can really use them then. . You can make so many things with scrabble - magnetic scrabble for the fridge, scrabble decorations for the tree and even scrabble coasters.

 DON'T UNDERESTIMATE THE POWER OF CHOCOLATE!
I remember the one year where one of my boys got lots of little toys for his birthday but I added an extra large slab (the double size) as part of his gift pack.  To say that all the other gifts faded to obscurity would be an understatement!  He was so thrilled that he had this chocolate all to himself and he wasn't even interested in the rest!
If you have a post on how you keep to a budget over Christmas time, why not pop me an email and I would love to host your article as a guest post. 
Otherwise as always, leave a comment. What are you doing to keep Christmas simple?

Christmas on a Budget

You may remember my post on Is your fridge empty?  Like a lot of people worldwide, we are all having to make sure that we are spending wisely, cutting back on the extras and budget carefully.  It's a challenging thing to do - especially during this time of the year. The pressure to get all the right decor, get those expensive gifts and that big Christmas lunch!  How do we manage during this time?

We used to be consumed with doing Christmas right - the right gifts, the right tree, the right decorations, the right food - but really if we really want to get it right - we need to be looking at Christ.  I know its not easy when you are surrounded by friends and family who seem to have more, but I know what happens if you give into the pressure - come January and February, you can't pay bills, and you have overspent - suffering in the following months with budget issues because the budget was spent over Christmas.

I have decided to run a series on how to prepare for Christmas on a Budget and have fun doing it!  (of course we do, we don't want to be miserable and be so consumed with finances that we can't celebrate!)

I decided to start with the gifts as these normally take the most time to make or find.  You also don't want to be running around looking for gifts 5 days before Christmas - by then everything is gone!

The series will include:
 * Gifts
* Decorations
* Wrapping and Bows
*  The Meal
and anything else I think of along the way

Join in on the fun, send me your ideas, share some links.... join us on this journey.  

Christmas Gifts (Part 1)

Buy Basic Craft Colours
Before you start, if you do decide to craft your gifts and decoration, get some red, green, gold/silver paint.  It helps.  Or choose a colour theme - then you only need to get one:)  But again paint isn't always necessary - go natural!  I love natural, not only because its cheaper but because I think that its important for the children to focus on beauty and not on bling.
  Recycled or Re-purposed Items from a Second Hand Store
One year I bought a number of second hand wood items for about R5 each, sanded them down, put pictures on with modge from recycled wrapping paper and then varnished them.  They were a huge hit! Again be careful don't spend a fortune on modge podge or paints. Rather do this if you already have the materials or if you know where to get this fairly cheaply.  Some of the items I used were wooden cutlery tray, condiments holder, knife holder and a salt and pepper shaker.

 Cookies in a Jar

 There are so many recipes online.  Choose a simple one.  If you want to make a more expensive variety then "upsize" it but just the layers with a pretty label and a cute lid will make this special.  In fact a lot of my friends have never seen this before (except the ones who enjoy reading blogs) so I know this would be a real winner.
Go Online - Gumtree/ Craiglist
I find these especially useful for gifts for children. They often want the big things which cost big bucks!  However if you look around you may find unusual gifts for them.  Be careful though that you don't pay for anything in advance.  Go and look first.  Also anything electrical is a bit suspect as it might not work when you get home because they don't tell you about a fault that exists or lose wiring.


Gift Movie/ Slideshow
This is especially a good gift for Granny's and Grandpa's or close family members (your friends might not appreciate a slide show or movie of your children).  Its so easy to do.  All you need to do is choose a selection of photos.  Choose the order you want it in, add music - and you can even make it a movie and its a wonderful keepsake. Software for this type of gift is free.  You can use a basic image program like Picasa. Get the children to make their own personalised cover and you can add words to pages as well.  It really is quite nifty and Granny and Grandpa will be very impressed.

5$ Store
There are usually a few goodies that I enjoy getting from a $5 store, and make great gifts.
Colourful nail polish - there are few teenagers who don't love fluorescent pink, crazy orange or sky blue nail polish.  With the current trends in nail art, this will be a great Christmas gift for any teenage girl or younger.  Even Ruthie (3) LOVES nail polish.(and her mother mind you)


These few ideas should keep you busy for a while. Keep a look out for the next edition of  Gifts for Christmas on a Budget

If you have a post on how you keep to a budget over Christmas time, why not pop me an email and I would love to host your article as a guest post.  Otherwise as always, leave a comment. 

*************************************************
And if you have done so already go and enter our Giveaway, you have till Wednesday!

Monday, December 3, 2012

Christmas on a Budget: Nativity Scene


I have always wanted to do a Christmas nativity scene with my children but to buy them is normally very expensive.  I wasn't really inclined to do it in clay, to make clothes and all the rest. Yes, call me lazy - I confess!
  But then I found a lovely printable nativity scene.  What really works is to print it off in colour cardboard.  Especially for the younger ones.  There are a lot of little characters and the colouring in does take a long time.  This way if they can't finish, they can still have something really bright and colourful.


 And of course with 3 fairly competitive children there was no way that only one would be chosen so we have 3 nativity plays! And they are beautiful.  A bit of tumbleweed and the same stars we made with our magazine christmas trees.

To print this nativity scene, follow this link.

Happy Crafting!
*********************************

And don't forget about our Reading Egg Giveaway!

Tomorrow is your last chance to get your comments in!

Christmas on a Budget: Decorations

After our snowflakes and gifts, we decided to start with some trees for decorations.  With a tight budget, its easier to work with materials you already have in your home of with materials that others might have in abundance.  I am sure that all of you have magazines or know someone with lots of magazines.

Magazine Christmas Trees Tutorial
This is simply one of my favourite crafts, because I always  have loads of magazines and though we craft all the time, I defnitely don't use them all up.

Step 1
One magazine.  Sorry Pick 'n Pay - I love your magazine but today you are being used for craft! You don't need to get this specific magazine, any glossy one will do.  Just watch out for those Popular Mechanics because I know that I wasn't very popular when I suggested using them arts and crafts.  My hubby definitely did not see the humour in that suggestion at all.


Step 2:  
Open to the first page.  (keeping the step simple:)


Step 3
I could probably do this wordlessly but I have a friend who blogs who really detests lots of pictures, so the only way I can keep her motivated to keep scrolling down is to let her think that I might have something interesting to say.  Plus I was reminded this week on more than one occassion that the fact that I haven't blogged for a week is ...... let's just say .... unacceptable!  Well that will teach me, can't start a blog and though go MIA (yes missing in action!)

So fold to the centre.

Step 4
Fold again.  It looks almost like the beginning of a paper plane.

Step 5
Move it over to the left.

Step 6
And now you start from the beginning and repeat.

Step 7
Cut the bottom points off.  You're doing this otherwise the tree won't stand up straight but topple over. 

Step 8
Pull off the magazine cover. Don't worry if a page comes off with it.  Some of the covers come off that way. This is what it will look like from the back after cutting and removing the cover.
And if you put it against the wall, it looks fabulous. 
And if you make lots of them, which we did because we have lots of children.... just in case you didn't know (4 and counting:)
And if you want to add the stars on a stick like we did, you can find a template here


We didn't try this, but I am sure you could make an amazing centrepiece, simply by sticking two of them together with glue and adding the star.

Happy Crafting!